

Let me catch you all up to speed with my build. I've been stock piling materials for several weeks now and am slowly making progress on the framing.
My first theater design was in 2009 for a new home I had designed (architect by trade), but we didn't build it. Fast forward 3 years, bought a newly constructed home in January of 2012 and put in a couple of provisions for my dedicated theater during the build. My dad builds homes for a living (and built mine), so I got the chance to add some dedicated electrical outlets and coax to the closet under the central stairs which will be my future AV/Media closet.
Pay no attention to the color scheme as I haven't decided on ANY of the colors yet.

Xray view facing the screen:

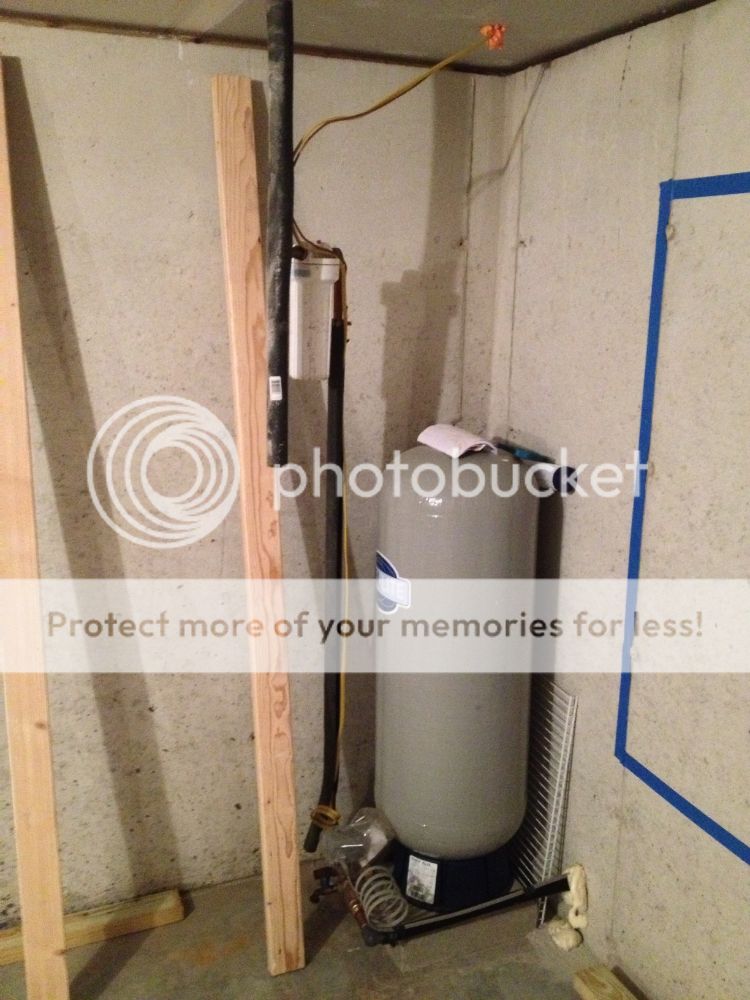
I'm moving this water pressure tank next weekend so that it's out of the theater:
Framed the entry door:

I'm using 2x4's spaced at 24" on center and will be using one layer of 5/8" drywall for the walls and soffits (more on this later). I'll be using a million and a half tubes of acoustic sealant anywhere I can. I built the wall parallel to the existing stairwell wall and held it off by 1". And also built the return wall which creates the storage space behind the back of the HT. I'll be picking away at the other two walls over the course of this week. I plan on holding the walls along the concrete foundation walls by at least 2" to allow for the water inlet pipe run back to the storage room. I'll be wrapping the new pipe in insulation so that it doesn't create noise within the wall.
The finished room dimensions will be approximately 12'-2" x 19'-8" x 7'-3" before acoustic treatments. I've fully decoupled the walls using the room within a room concept. The only attachment points to the pre-existing structure will be at the sill plate that rests on foam sill sealer and the tops of the walls which will be held utilizing RSIC-DC04's fastening thru the existing drywall into the floor trusses. The existing ceiling is 5/8" drywall with engineered floor trusses with the cavities filled with R19 fiberglass batts. Since I'm building a "fish-tank" I'm hoping I can watch movies and play my video games while my wife and son sleep two stories up. We'll find out since, once I get the first layer of drywall up in the room, I'm going to do some serious, full range, high SPL testing. If I find that my methods are not sufficient I will add another layer of 5/8" drywall with Green Glue between the staggered layers. If that still doesn't function, I'll just have to adjust the maximum volume setting on my Onkyo! :heehee:
I'm new to posting here but have been an avid reader/researcher of both this forum and AVS. So I'm familiar with the methods used for sound isolation and the like. I haven't set a budget on this build as I will pick away at it as funds allow. So far, I've got a stock pile of all the 2x4's I'll need with only the riser and stage lumber to purchase. I've got seven 3" can lights for the soffits, black Lutron dimmers, black outlets, electrical boxes, wiring, 200' of CL2 speaker wire, PVC electrical conduit which will create a raceway around the soffit for future low voltage runs, RG6 subwoofer cable, a 7.1 HDMI wall plate for the AV closet, High Speed HDMI cable for the PJ, all the R13 insulation I'll need for the walls and soffits and probably a bunch more of miscellaneous items I'm currently forgetting.
Every trip I make to Home Dustpan :rofl: from now on, I pick up at least one 50lb bag of sand since I will need 30 of them to fill my stage. I'm currently at 8. It's less burdensome to lug one or two bags down every couple of days rather than trying to do it all at once. BTW, that's over 1500 pounds of sand...
I've got some 3/4" MDF left over from subwoofer builds (I install car audio as a part time job) which I will use to make backer boxes for outlets/lights and such. I'm going to mount my PJ within a hush box which will have an exhaust fan dumping the hot air into the adjacent storage space and keeping as much of the PJ's noise out of the HT.
I'm framing the soffits in such a way that actually makes them more like roof framing. They will not touch the existing ceiling and will hang from the new wall framing at the perimeter of the HT utilizing Simpson Strong-ties. Therefore, it will be decoupled from the rest of the house. Any penetration into the HT drywall will receive a backer box of MDF and sealed with acoustic sealant. The soffit and the main ceiling cavities will be filled with fiberglass batts as well.
I'm going to build an 8' x 8' riser and push it to the back and one side of the HT. This will allow my in-swing door to fully open 90 degrees and will allow for the most seating. My seating plans are to get a reclining sofa for the front row and I'm still battling my decision for the back row. I've found some real theater seats locally on craigslist, but I'm sure they aren't all that comfortable. But at only $150 for two rows of 4, I may just buy them and see if I can squeeze both rows on my riser 8'x8'... Since the theater will be used by only me 60% of the time and by me, my wife and one son 25% more, with only the remaining 15% being for family gatherings and parties, the sofa will be the money seat while the back row(s) are "filler" seating. I may have just talked myself into buying those seats while typing this! :heehee:
Actual shot of one of the seats I might buy:

If you haven't noticed already, I tend to ramble on and type too much but it's mostly due to me keeping a running list of things I need to do or decide on or even things I need help with.
And before I get bombarded with "what are you doing for HVAC" questions, let me give you a bit more information. I live in Maine. My basement is 8 to 10 degrees cooler (even more so in the winter) than the rest of the house and currently has no heat source besides the earth below and surrounding it. I've got 2" of rigid insulation under the slab and 8" thick concrete walls around the perimeter. We, here in Maine, don't have central forced air, ducted HVAC systems because we don't usually have the need for cooling. When and if we do, we use window AC units to cool our homes. The adjacent room to my theater will be a game room / bar area which has two windows that can easily take a window AC unit if the need arises. As for heat, the adjacent room will get one of the infrared Edenpure fake fireplace heaters and that's it, no heat in the theater other than warm bodies and lighting (my equipment will all be within the AV/Media Closet). If I find that the air is too stale in the HT, I will simply open the door and run a small room fan to circulate the air. When it's just me in the theater most of the time I can't imagine it getting uncomfortable over the course of under 3 hours and if it does I'll figure out a way to manage it then. For now, there is absolutely zero plans for any venting or cooling for my HT. My initial plan was to use two dead vent systems, (one for supply and one for exhaust) and although it would be a royal PITA, I've designed the framing to allow for me to add them in if I need them, only needing to cut away the drywall. Go ahead, you can say it now... "We told ya so". Yeah, yeah.
:hsd:
List of currently owned equipment:
Denon X1100W
Xbox One
Wii
Klipsch Reference RF-62 II (LCR)
Klipsch S-10 (Surrounds)
Dayton B652's (Front heights, for now)
TubaHT (I might build another one later)
Behringer NU1000DSP Sub Amp
Epson 8500UB (traded it for the Panny I won, hopefully no hard feelings from HTS)
DIY 46x108 (117.5" diag.) 2.35:1 AT Screen
My first theater design was in 2009 for a new home I had designed (architect by trade), but we didn't build it. Fast forward 3 years, bought a newly constructed home in January of 2012 and put in a couple of provisions for my dedicated theater during the build. My dad builds homes for a living (and built mine), so I got the chance to add some dedicated electrical outlets and coax to the closet under the central stairs which will be my future AV/Media closet.
Pay no attention to the color scheme as I haven't decided on ANY of the colors yet.

Xray view facing the screen:

I'm moving this water pressure tank next weekend so that it's out of the theater:

Framed the entry door:

I'm using 2x4's spaced at 24" on center and will be using one layer of 5/8" drywall for the walls and soffits (more on this later). I'll be using a million and a half tubes of acoustic sealant anywhere I can. I built the wall parallel to the existing stairwell wall and held it off by 1". And also built the return wall which creates the storage space behind the back of the HT. I'll be picking away at the other two walls over the course of this week. I plan on holding the walls along the concrete foundation walls by at least 2" to allow for the water inlet pipe run back to the storage room. I'll be wrapping the new pipe in insulation so that it doesn't create noise within the wall.
The finished room dimensions will be approximately 12'-2" x 19'-8" x 7'-3" before acoustic treatments. I've fully decoupled the walls using the room within a room concept. The only attachment points to the pre-existing structure will be at the sill plate that rests on foam sill sealer and the tops of the walls which will be held utilizing RSIC-DC04's fastening thru the existing drywall into the floor trusses. The existing ceiling is 5/8" drywall with engineered floor trusses with the cavities filled with R19 fiberglass batts. Since I'm building a "fish-tank" I'm hoping I can watch movies and play my video games while my wife and son sleep two stories up. We'll find out since, once I get the first layer of drywall up in the room, I'm going to do some serious, full range, high SPL testing. If I find that my methods are not sufficient I will add another layer of 5/8" drywall with Green Glue between the staggered layers. If that still doesn't function, I'll just have to adjust the maximum volume setting on my Onkyo! :heehee:
I'm new to posting here but have been an avid reader/researcher of both this forum and AVS. So I'm familiar with the methods used for sound isolation and the like. I haven't set a budget on this build as I will pick away at it as funds allow. So far, I've got a stock pile of all the 2x4's I'll need with only the riser and stage lumber to purchase. I've got seven 3" can lights for the soffits, black Lutron dimmers, black outlets, electrical boxes, wiring, 200' of CL2 speaker wire, PVC electrical conduit which will create a raceway around the soffit for future low voltage runs, RG6 subwoofer cable, a 7.1 HDMI wall plate for the AV closet, High Speed HDMI cable for the PJ, all the R13 insulation I'll need for the walls and soffits and probably a bunch more of miscellaneous items I'm currently forgetting.
Every trip I make to Home Dustpan :rofl: from now on, I pick up at least one 50lb bag of sand since I will need 30 of them to fill my stage. I'm currently at 8. It's less burdensome to lug one or two bags down every couple of days rather than trying to do it all at once. BTW, that's over 1500 pounds of sand...
I've got some 3/4" MDF left over from subwoofer builds (I install car audio as a part time job) which I will use to make backer boxes for outlets/lights and such. I'm going to mount my PJ within a hush box which will have an exhaust fan dumping the hot air into the adjacent storage space and keeping as much of the PJ's noise out of the HT.
I'm framing the soffits in such a way that actually makes them more like roof framing. They will not touch the existing ceiling and will hang from the new wall framing at the perimeter of the HT utilizing Simpson Strong-ties. Therefore, it will be decoupled from the rest of the house. Any penetration into the HT drywall will receive a backer box of MDF and sealed with acoustic sealant. The soffit and the main ceiling cavities will be filled with fiberglass batts as well.
I'm going to build an 8' x 8' riser and push it to the back and one side of the HT. This will allow my in-swing door to fully open 90 degrees and will allow for the most seating. My seating plans are to get a reclining sofa for the front row and I'm still battling my decision for the back row. I've found some real theater seats locally on craigslist, but I'm sure they aren't all that comfortable. But at only $150 for two rows of 4, I may just buy them and see if I can squeeze both rows on my riser 8'x8'... Since the theater will be used by only me 60% of the time and by me, my wife and one son 25% more, with only the remaining 15% being for family gatherings and parties, the sofa will be the money seat while the back row(s) are "filler" seating. I may have just talked myself into buying those seats while typing this! :heehee:
Actual shot of one of the seats I might buy:

If you haven't noticed already, I tend to ramble on and type too much but it's mostly due to me keeping a running list of things I need to do or decide on or even things I need help with.
And before I get bombarded with "what are you doing for HVAC" questions, let me give you a bit more information. I live in Maine. My basement is 8 to 10 degrees cooler (even more so in the winter) than the rest of the house and currently has no heat source besides the earth below and surrounding it. I've got 2" of rigid insulation under the slab and 8" thick concrete walls around the perimeter. We, here in Maine, don't have central forced air, ducted HVAC systems because we don't usually have the need for cooling. When and if we do, we use window AC units to cool our homes. The adjacent room to my theater will be a game room / bar area which has two windows that can easily take a window AC unit if the need arises. As for heat, the adjacent room will get one of the infrared Edenpure fake fireplace heaters and that's it, no heat in the theater other than warm bodies and lighting (my equipment will all be within the AV/Media Closet). If I find that the air is too stale in the HT, I will simply open the door and run a small room fan to circulate the air. When it's just me in the theater most of the time I can't imagine it getting uncomfortable over the course of under 3 hours and if it does I'll figure out a way to manage it then. For now, there is absolutely zero plans for any venting or cooling for my HT. My initial plan was to use two dead vent systems, (one for supply and one for exhaust) and although it would be a royal PITA, I've designed the framing to allow for me to add them in if I need them, only needing to cut away the drywall. Go ahead, you can say it now... "We told ya so". Yeah, yeah.
:hsd:
List of currently owned equipment:
Denon X1100W
Xbox One
Wii
Klipsch Reference RF-62 II (LCR)
Klipsch S-10 (Surrounds)
Dayton B652's (Front heights, for now)
TubaHT (I might build another one later)
Behringer NU1000DSP Sub Amp
Epson 8500UB (traded it for the Panny I won, hopefully no hard feelings from HTS)
DIY 46x108 (117.5" diag.) 2.35:1 AT Screen
")


